How to Add an Electrical Outlet From an Existing Light Switch
Dan has been a licensed journey-level electrician for some 17 years. He has extensive experience in most areas of the electrical trade.
Wall switches can be added to control plug in lamps and other devices.
Wilderness
Why Add a Switch to an Electrical Outlet?
There are two main reasons that most people would add a switch to an electrical outlet: to either switch that outlet (or half of it, anyway) or to add a light somewhere. This article will assume that the first is the reason you are reading this: you want to switch that outlet on and off.
Switched outlets are very common in the modern construction of new homes. It is much cheaper for a builder to add a switch than it is to add a switch plus a ceiling electrical box plus a light fixture. The new owner is expected to use a lamp to light the room rather than a ceiling light.
Switching an outlet yourself will allow you to switch a lamp from a convenient location rather than unplugging it or switching it off at the lamp. It is also possible to plug such things as TV sets, computers, or other "vampire" appliances into a switched outlet, saving electricity over time by turning those appliances completely off. Not a bad idea. Plus, it protects sensitive electronics from voltage spikes due to lightning or utility problems.
What You'll Need to Add a Switch
You'll need a new switch and new wire. To get the right type, you must know the size of the circuit breaker or fuse protecting the outlet.
How to Find Out the Size of the Circuit Breaker or Fuse?
Plug in a lamp or radio and turn off breakers or remove fuses until you find the one that shuts off the power to the outlet. It will be marked with the ampacity of the circuit, either a 15 amp or 20 amp circuit. That number will determine the rating of both the switch and the wire to be used. The switch must never be rated for less than the circuit; a 20 amp circuit must have a 20 amp switch while a 15 amp circuit may use either a 15 or 20 amp switch.
Similarly, a 20 amp circuit requires #12 wire while a 15 amp circuit may use either #14 or #12 wire (although #14 is cheaper and easier to use). You will need 3 conductor wire, typically labeled either 14/3 or 12/3 depending on size; it will have 3 insulated wires plus a bare grounding wire. Make sure that you have enough wire to reach to either the attic or crawl space, across to the wall where the new switch is to be located and down to the switch. Measure carefully and add ten feet or so; better to have too much than too little.
You will need an "old work" box for the switch and almost certainly another one to replace the one the outlet is in, along with a small handful of wire staples to fasten the wire to rafters or joists with. A few wire nuts will be useful, and you will need a cover plate for the new switch.
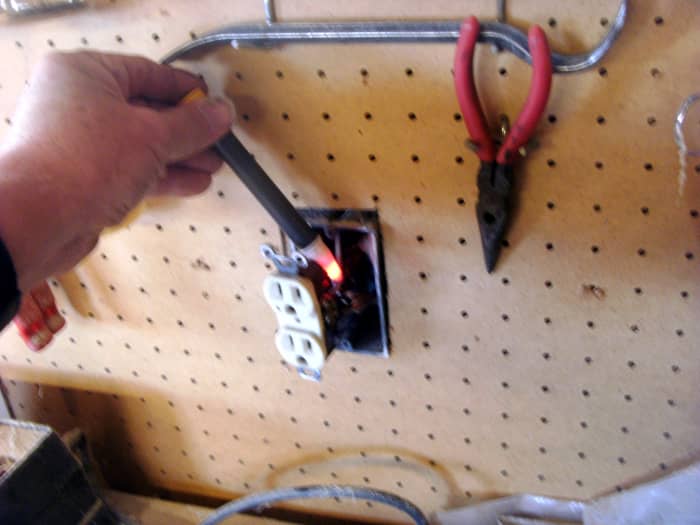
Using a non contact voltage detector.
Wilderness
How to Run the Wire for the New Switch
This is the most labor-intensive part of the job and will require the most work. Wire must be run from the outlet to the new switch and that isn't always easy.
- Holes must be drilled inside the stud bay, either through the floor into the crawl space or through the top plate into the attic, at both the existing outlet and the new switch.
- Wire must then be fed through the hole, across the space and into the wall with the switch. It must then be inserted in the respective electrical boxes, along with any existing wire.
It is beyond the scope of this short article to detail how this is to be done, but a second article on adding an outlet to an existing outlet does. If you're having any trouble, please reference that article on how to run wire between an existing outlet and a new outlet or switch.
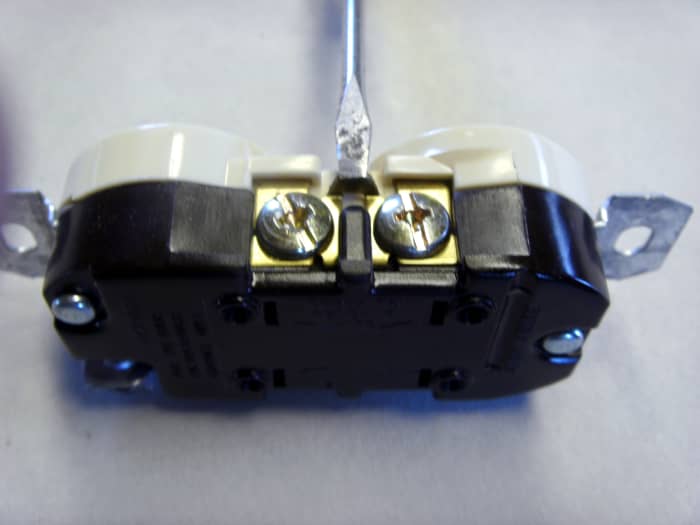
The tip of the small screwdriver is resting on the tab that needs breaking off for a half hot outlet. This tab provides an electrical connection between the two screws and must be removed to allow the two plug in spots to operate independently
Wilderness
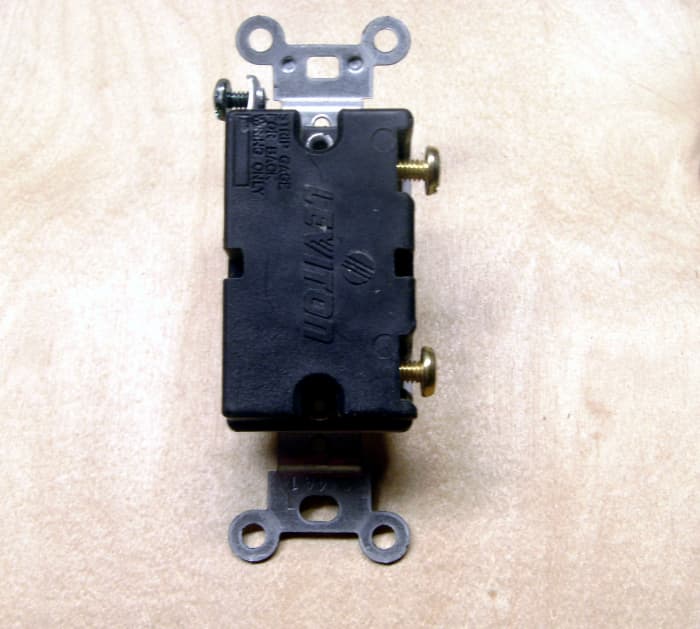
A typical light switch. The black and red wires terminate on the brass screws on the right, the smaller screw near the top of the switch is colored green and is for the ground wire.
Wilderness
Read More From Dengarden
How to Wire the New Switch
The existing outlet will have black and white wires attached to it, and probably a third ground wire that is either green in color or bare of any insulation.
- Remove the black wire from the outlet and, using a wire nut, splice it to the black wire in the new cable you have run.
- If the existing white wire is spliced into other white wires, add the new white wire to the wire nut. If it is not, cut a short, 6" piece of white wire, remove the white wire from the outlet and splice the short piece, the existing white wire and the new white wire all together.
- Terminate the short piece back to where the white wire came from. Do the same for the ground wire—that wire that is either green or bare of insulation.
- If the outlet is to be completely switched (both plug-in spots), terminate the red wire in the new cable to where the black wire used to be. If the outlet is to be a half hot outlet, half of it permanently powered and half of it switched, break the small tab between the two brass-colored screws off.
- Do not break the tab between the silver-colored screws, just the one between brass screws. A small 6" piece of wire must be added to the splice of the two black wires and terminated on one of the brass screws (normally the bottom one). The red wire in the new cable is terminated on the upper brass screw.
- Please note that one of these two screws is where the original black wire used to be terminated—the small tab between the screws used to power both plug-in spaces from one screw, but a wire to each one is now required.
- To terminate a wire onto a screw, strip the insulation from the last ½" of wire and bend it into a loop. Wrap it around the screw in a clockwise direction and tighten the screw.
- The new switch is wired by attaching the black wire to one screw, the red to a second screw and the ground wire to the ground screw located near one end of the switch. While it doesn't make any difference which brass screw is chosen for which colored wire, make sure that the ground screw attaches to the ground screw.
- Install the switch into the new electrical box and fit the cover plate to it with the two small screws that came with the cover plate. You're finished!
This article is accurate and true to the best of the author's knowledge. Content is for informational or entertainment purposes only and does not substitute for personal counsel or professional advice in business, financial, legal, or technical matters.
Questions & Answers
Question: How do you add a switch to an existing outlet that prevents it from being energized when unattended (keeps children from getting shocked)? Just want to place the switch at a height above outlet that children can't reach.
Answer: Follow the explicit directions given in the article at https://hubpages.com/home-improvement/Adding-a-Swi...
Question: I have a CPAP machine which is powered through an AC to DC transformer (or power supply @125VAC, 1.5 Amperes). Is it safe to install an ON/OFF in-line lamp switch between the CPAP converter and the AC wall outlet? I'd like to avoid plugging and unplugging my CPAP machine before and after using it so the converter doesn't consume power while it is plugged in.
Answer: Certainly. There isn't much difference between a switch and unplugging, after all. An alternative would be to make the outlet a "half hot", as shown here: https://hubpages.com/home-improvement/home-wiring-... Half the outlet remains hot while the other half is switched via a wall switch.
Question: I ran a new wire from a light switch to an overhead light. The area overhead above the ceiling joist is very close together. Should the wires be stapled to the ceiling joist? The wire is going across the top of the joist.
Answer: Code requires that the wire is stapled unless it is being "fished" through an inaccessible space such as the inside of a wall. If it is possible to do so, it should be fastened to the joists, but if you can't reach the wire and use a hammer to nail down the staples, it is fine as is.
Question: I have two switches in my kitchen. One goes to a light in the kitchen, and the other one to a light outside. How do I run the same wire to the extra lights outside?
Answer: You will have to splice into the wires in the outside lights and run it to the other outside lights. If that isn't practical, though, and if there is a neutral in the cable to the switch controlling the outside light, a wire could be spliced to that neutral and to the black wire going to the outside light, at the switch box. Without the neutral (white wire) in the same cable as the wire going to the light, though, the only option is to use the wires at the light, not in the box.
© 2012 Dan Harmon
Dan Harmon (author) from Boise, Idaho on February 16, 2013:
ktrapp, while it is possible that each light is wired to the switch (whereupon it's an easy task to put a second switch in) it is far more likely that one light is wired to the other. In that case additional wire would have to be run from the switch to the second light and it is likely to require replacing the wire from the switch to the first light as well. Examination of the switch box would probably tell the story; if there are less that 4 cables entering it additional wiring will be necessary.
It is certainly possible, but will require considerable work. If you are interested in doing this, let me know and I will walk you through checking as to what is necessary and how to do it.
Kristin Trapp from Illinois on February 14, 2013:
This is really helpful information and I can think of one location in my house where I would like to do this. I do have a slightly different electrical problem though, and I'm wondering if you perhaps have a Hub already with a solution. In my kitchen there is one single switch that controls both the light over the island and the light over the table. I'm wondering how to add an additional switch so each fixture has its own switch.
How to Add an Electrical Outlet From an Existing Light Switch
Source: https://dengarden.com/home-improvement/Adding-a-Switch-to-an-Electrical-Outlet